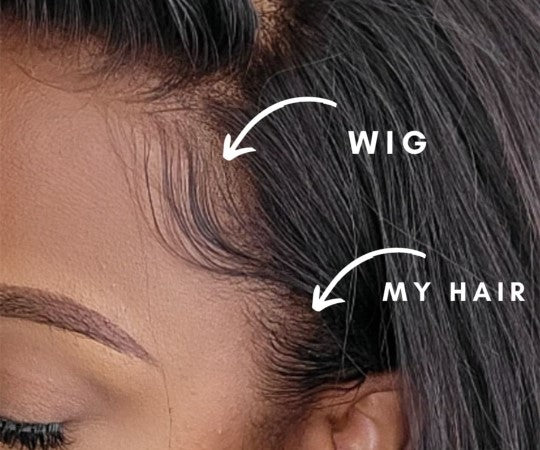
How To Install A Human Hair Lace Wig?
A Comprehensive Guide to Installing a Human Hair Wig
Wigs have become an essential accessory for both men and women. Not only do they provide an instant makeover, but they can also help cover thinning hair or hair loss due to medical conditions. If you're new to the wig game, it might be a bit overwhelming trying to figure out how to install a human hair wig properly. But don't worry, we at Myfirstwig.com have got your back! In this guide, we will walk you through the process of installing a human hair wig step-by-step, ensuring a flawless and natural look.
Step 1: Prepare Your Natural Hair
Before you install your human hair wig, you must first prepare your natural hair. For short hair, simply brush it back and away from your face. For longer hair, you can either create cornrows, braid your hair or secure it flat using bobby pins. Make sure your hair is clean, dry, and evenly distributed throughout the head to ensure a smooth and comfortable fit.
Step 2: Prep Your Wig
If your wig is a lace front or full-lace human hair wig, you'll need to trim the excess lace to match your hairline. Place the wig on a mannequin head or your own head, and carefully trim the lace with sharp scissors or a razor close to the hairline. Be cautious not to cut too close to the hairs. Remember, it's always better to trim conservatively and go back if needed.
Step 3: Apply a Wig Cap
Wig caps help to protect your natural hair and keep your wig in place. For added comfort, use a high-quality nylon or mesh wig cap. Make sure that all your natural hair is secured underneath the wig cap and check for any visible hair sticking out. Adjust the cap so that it fits comfortably and snugly on your head.
Step 4: Test the Fit
Place the wig on your head gently, ensuring that it's centered and evenly aligned with your hairline. Check whether it fits comfortably and securely on your head. Adjust the straps on the wig (usually located at the nape) to your desired tightness for a comfortable fit. If necessary, use additional clips or combs to hold the wig firmly in place if the wig is too loose.
Step 5: Install the Wig
Once your wig is securely in place, use your fingers or a styling comb to gently adjust the hair and create a parting that suits your desired style. Make sure that the hair is not tangled or caught during the process. To make the parting look more natural, you can use a bit of concealer that matches your skin tone to create an illusion of a natural scalp.
Step 6: Style Your Wig
Now that your wig is installed, it's time to style it to your preference. Use heat styling tools such as flat irons, curling irons, or hair dryers cautiously and at a low heat setting to prevent damage to the wig. You can use hair products like mousse, serum or hairspray for better styling and hold.
Remember, when it comes to styling your human hair wig, practice makes perfect. Continue to experiment with different hairstyles to find the look that best suits your personality and style preferences.
Installing a human hair wig does not have to be complicated. With these simple steps, you can easily achieve a natural and flawless look. Start by preparing your natural hair and wig, apply a wig cap, test the fit, install the wig, and then style it to your preference. Following this guide will help ensure a secure, comfortable, and natural-looking wig installation. So go ahead, and confidently flaunt your new hairstyle!
👇📺You can also watch the hair video for all details you need to know:
🛒Shop the same hair:


Leave a comment