How To Install A Wig With Bangs/ Fringe?
A Step-by-Step Guide for Beginners
A wig with bangs or fringe is an excellent choice for those who want a fresh and stylish look without the commitment of cutting their hair. It is suitable for all face shapes, and it adds a unique touch to your overall appearance. Moreover, wigs with bangs can be a great option if you want to protect your natural hair from damage caused by heat styling or coloring. In this article, we will guide you on how to install a wig with bangs/fringe effectively, ensuring a flawless and natural appearance.
Step 1: Prepare Your Natural Hair
Begin by washing and conditioning your hair. Make sure it is completely dry before installing the wig. If you have long hair, consider braiding it in cornrows or securing it in a low ponytail. This will provide a flat surface for the wig cap and prevent any lumps or bumps.
Step 2: Apply a Wig Cap
A wig cap is an essential component that helps protect your natural hair and keep it in place under the wig. Carefully stretch the wig cap over your head and ensure it covers your hairline. Adjust the cap as necessary to make sure it is secure and comfortable.
Step 3: Trim the Bangs/Fringe
Before installing the wig, you might need to trim the bangs/fringe according to your face shape and personal preference. Measure the length of the bangs, keeping in mind that they should not cover your eyes. Use a pair of sharp hair scissors to trim the wig's bangs/fringe to the desired length carefully.
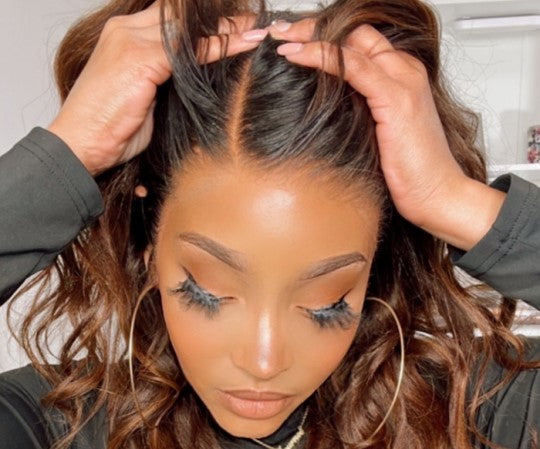
Step 4: Put on the Wig
With the wig cap secure, place the wig on your head. Start by aligning the front of the wig with your hairline, and then pull the back of the wig down to cover your nape. Ensure the wig is centered, and the wig's hairline sits just behind your natural hairline.
Step 5: Secure the Wig
Many wigs come with built-in, adjustable straps that help keep the wig in place. Adjust these straps as needed to ensure a snug fit. For added security, you can also use wig clips or bobby pins to anchor the wig in place. Attach these clips to the wig's hairline and secure them to your natural hair or wig cap underneath.
Step 6: Style the Wig and Bangs/Fringe
Once the wig is secure, use a wide-tooth comb or your fingers to gently detangle and style the wig. For the bangs, comb them forward and style them according to your preference. You may use a flat iron or a curling iron to create the desired look for the bangs/fringe. However, be cautious when using heat styling tools on synthetic wigs as it may cause damage.
Step 7: Blend Your Natural Hairline (Optional)
If your wig has a lace front, you can create a more natural-looking hairline by blending your natural hairline with the wig. Apply a small amount of edge control or gel on your natural hair edge and use a brush or toothbrush to blend it with the wig's hairline.
Learning how to install a wig with bangs/fringe is easy and allows you to achieve a trendy and stylish look while protecting your natural hair. Follow these seven simple steps to successfully install and style your wig with bangs: prepare your natural hair, apply a wig cap, trim the bangs/fringe, put on the wig, secure the wig, style the wig and bangs/fringe, and blend your natural hairline (optional). With practice and patience, you will be able to install your wig with confidence and enjoy your new look.
👇📺You can also watch the hair video for all details you need to know:
🛒Shop the same hair:


Leave a comment